Showing posts with label cook. Show all posts

Monday, August 15, 2011

Summer salad of Greenmarket heirloom tomatoes, radish, fresh basil and parsley, olive oil, lemon, and red onion

Saturday was a truly glorious day. I awoke at 8 am to the sun shining through my window and the weather pleasant enough to draw droves of New Yorkers outside for early morning strolls. I looked outside as the sun's line crept slowly through the city, heralding the day.

I decided that it was a perfect day to go visit the Union Square Greenmarket. I took the subway, which shot me down to the Union Square area like a bullet. Walking around the market was like being a kid in a candy store. The heirloom tomatoes were all in season; they were marvelous. There were tomatoes of all sizes and shapes and colors. Green, yellow, red, yellow-green, small, large, medium sized, enormous, tiny. I wanted to buy everything and more.

I ended up buying several beautiful heirloom tomatoes, a fresh bunch of basil enough to make enough pesto for several fat Italian mafioso, a few bottles of Greenmarket wine (both whites), some radishes, some cranberry beans, green peppers, and other fresh produce.

Tonight, after coming home from a long and exhausting day at work, the last thing I wanted to do was cook a long and involved dinner. I had been dreaming of the heirlooms all day and quickly opted for a light summer salad.

Recipe:
Summer salad of heirloom tomatoes

Ingredients:
6 large heirloom tomatos, preferably from your local farmer's market
1 radish, sliced thin
1 small red onion, minced
1 tbspn lemon oil (or fresh lemon juice)
3 tbspn olive oil
2 tbspn parsley, finely chopped
2 tspn mint, finely chopped
2 tspn basil, finely chopped
salt and pepper, to taste

1. Bring a large pot of water to a roaring boil. In the meantime, prepare an ice bath.
2. Using a small knife, cut a very shallow X pattern on the bottom part of each tomato (the part opposite the stem).
3. Skin the tomatoes as follows: When the water is at a roaring boil, dip each tomato in the water until the skin begins to break apart. Transfer with a strainer to the ice bath immediately. When the tomato cools, peel the skin carefully and let dry on paper towels. Repeat for each tomato.
4. Cut the dried tomatoes into sections about 1.5 inch cubes. Salt and pepper to taste.
5. While the tomatoes' flavors are developing from the salt and pepper, prepare the dressing. In a bowl, whisk together the oils, herbs, salt, pepper, lemon juice, onion, and radish.
6. To serve, place a few pieces of tomato on each of six serving plates. Add the dressing. Garnish with a sprig of parsley.

Serves 6.


Sunday, August 14, 2011

Fluke Crudo

Now that summer's in full swing, I decided to make a no-cook dish for a dinner party. This is a delightful appetizer that stimulates the appetite.

I was walking through the Union Square Greenmarket, browsing some locally-grown produce when I saw these amazing grapefruits and oranges. They were plump and begging for a nice fish to complement them in a crudo.

I settled on some wild-caught fluke from Whole Foods. At $5.99 a pound, they were as equally affordable as delicious. The fishmonger was also kind enough to descale, gut, and clean the fish for me, and separate the pristine, skinless fillets from the bones and head that I will later use to make fish stock.

The dish came out perfectly; the acidity of the citrus "cooked" the fluke lightly, without muddling or masking the delicate flavor. I added a fine herb mixture of chopped parsley, mint, and basil to enhance the freshness of the dish. I think the only difference I'd make is to add some more spice.

Fluke Crudo (Adapted from Derek Wagner, Nicks on Broadway, Providence, R.I.)

Ingredients:
1 pound skinless fillet of sushi-grade fluke, cut into pieces about 1/4 inch by 1 inch by 2 inches
1/2 cup lime juice
3/4 cup lemon oil
1/4 cup rice wine vinegar
2 shallots, minced
3 fresh Thai chili, sliced razor thin
Salt and black pepper
Inner, light green leaves from 1 bunch celery
18 orange segments (from 2 oranges)
18 grapefruit segments (from 2 grapefruits)
1 1/2 teaspoons capers
1/3 cup coarsely chopped mint
1/3 cup coarsely chopped parsley
1/3 cup coarsely chopped basil
6 radishes, sliced thin.

1. In a mixing bowl, mix together the lemon oil, lime juice, and vinegar. Add the chilis, shallots, salt and pepper to taste. Add the fluke, toss gently, and let sit for about 10-15 minutes.

2. Place the celery leaves in the center of six plates and alternate two orange and grapefruit segments around them.

3. Mound the fluke on top of the celery leaves. Spoon the dressing over the fish, sprinkle the capers, herb mixture, and radish slices. Garnish with an orange and grapefruit segment, and sprinkle with coarse sea salt.

Makes 6 servings.


Saturday, July 16, 2011

Gambas Al Ajillo (Shrimp with Garlic)

I woke up in the middle of the night to a growling stomach. I was hungry! I wanted to whip up something easy and delicious that would satisfy my hunger, so I thought of a quick and easy tapas dish to prepare. This Spanish classic is especially simple and doesn't require many exotic ingredients. There are a lot of ways to prepare this dish, and I will highlight the way I chose to make it.

Gambas Al Ajillo (Shrimp With Garlic)

1 lb shrimp, peeled and deveined
4 small chili peppers, minced
5-6 cloves garlic, minced
2 tspn pimenton (spanish paprika)
3 tbspn olive oil
1/2 lemon
cilantro (optional garnish)
salt and pepper

1. Clean the shrimp and pat dry. Let dry for a few minutes.
2. Heat olive oil in a heavy bottomed pan large enough to hold the shrimp in one layer.
3. Add garlic and chilis and cook over medium heat for about 30 seconds, or until fragrant.
4. Add the shrimp in one layer to the pan, and cook for about 2 minutes on each side.
5. Lower the heat to medium low and add pimenton, salt, and pepper to the shrimp.
6. Once the shrimp are finished cooking (you can test doneness by a simple knife test or by seeing if all the shrimp curl and look red), plate.
7. Add cilantro garnish and lemon peels on the side. Serve immediately.


Friday, April 1, 2011

Geoduck Clam Sashimi

Geoduck clams are giant clams that burrow deep into soil. They are one of my favorite foods, as sashimi. They are also one of the most expensive. The Japanese call them mirugai ("giant clam") and they are sliced super thin and served ice cold as sashimi in sushi restaurants.


I decided to undertake the preparation of my own home geoduck sashimi. Unfortunately, I forgot to take pictures and only have an image of the final product. I'll try to be as descriptive as I can.

Recipe: Geoduck sashimi

Ingredients:
1 Live Geoduck (2 lbs)
Sushi soy sauce
Wasabi

Directions:
0. Prepare an ice bath large enough to fit the geoduck. At the same time, fill a serving plate with crushed ice and some water. Cover with a piece of saran wrap.
1. Boil a kettle of water until it is boiling vigorously.
2. Place the geoduck in a clean sink with the hinge of the shell facing downward.
3. Carefully pour the water over the geoduck slowly, trying to hit each part of it.
4. Immediately plunge into an ice bath.
5. Once it is cool enough, remove the shell from the geoduck. It should be relatively easy. Rinse under cold running water.
6. From one end of the geoduck, pull the skin back. It should remove like an inverted stocking. Rinse again under cold water. Take care to rinse the mouth end. It can be quite sandy.
7. Place the geoduck on a cutting board. The geoduck should have two parts, the round, ovule bottom portion (the stomach), and the top part, which resembles a piece of flesh with a flap connecting both parts. Using your sharpest knife, slice this flap open to open up the geoduck.
8. Remove the stomach. Reserve for stock. Another way to use it is to cut into small pieces, bread with corn starch, and deep fry.
9. Slice the geoduck as thinly as possible, angling the knife almost horizontally.
10. Place the slices on top of the cold serving plate.
11. Refrigerate in the freezer for up to 15 minutes.
12. Combine the wasabi and sushi soy sauce in a small serving dish.
13. Serve, with an optional wine pairing. Riesling or chardonnay is an ideal choice (in my opinion)

Saturday, January 15, 2011

Chicken Wings with Garlic, Cilantro, and Lemon Juice

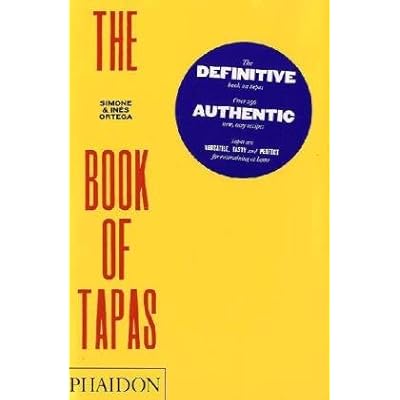
I bought myself a few cookbooks for Christmas. One of them was "The Book of Tapas," a new cookbook published in 2010 by Phaidon Press Limited. The authors are Simone Ortega and Inés Ortega, both renowned Spanish tapas chefs.
The book is a collection of simple recipes for tapas. They all look delicious; some look adventurous; and all look relatively easy to prepare and simple in terms of ingredients.

I made a variation of one of the recipes -- Chicken Wings with Garlic, Cilantro, and Lemon Juice.

I thought it was decent, but next time I will use less lemon juice, and possibly add some heat, like a diced pepper or something.

Recipe: Chicken Wings with Garlic, Cilantro, and Lemon Juice

Ingredients:
1 lb chicken wings
1 cup Olive oil
1 Habanero pepper, chopped
Juice of 1 lemon, strained
4-5 cloves garlic, chopped
Several sprigs of cilantro, chopped
Salt and pepper, to taste

Directions:
1. Rinse chicken wings and pat dry. Season both sides with salt and pepper.
2. Heat oil in a large skillet or frying pan. Cast-iron is preferred, as it will give a better flavor.
3. Add the chicken wings, in batches, and cook over medium heat, turning frequently, for 12-15 minutes, until evenly browned and cooked through. Check that the wings are cooked by piercing one with the point of a sharp knife; if the juices run clear and the meat is no longer pink, the chicken is cooked.
4. Drain the skillet, reserving about 2 tablespoons oil. Stir in the lemon juice. Add the garlic, cilantro, and pepper. Cook for about 5 minutes.
5. Serve the chicken wings immediately with the skillet juices spooned over them. These are good accompanied with French fries (chips) or a green salad.

Goat Stew with Fermented Bean Curd Sauce

Hi Everyone! Sorry for the dearth of posts. The holiday season is killing me. But here's to a new year and a new of cooking. Many many holiday parties and dinners have left me extremely hung over and extremely full. I've been slaving over the stove nonstop these past months with no time to cook for myself. My smoke detector (or as I dub it, my cooking detector) has been going off daily from my escapades.

Anyway, I wanted to make something a little less conventional and suitable for the holiday season. What came to mind was goat stew, but I wanted to make it even more unorthodox, so I added an ingredient that I knew nothing about: fermented bean curd. I found this ingredient at the Asian supermarket in the spices section.

The smell of fermented bean curd is very strong and pungent. It looked like reddish purplish mush, not very sexy at all. But I thought it would be perfect for a stew, its strong umami and sour flavor melding with the tenderness of the meat.
Here's the mise en place:
A close up of the goat meat I used. From the squawking Chinese that the lady at the Asian supermarket, I pieced together that the cut of meat I was sold was from the leg. Indeed, the goat meat was tough and fibrous, tendons and muscles running along with the grain. This was perfect meat for stewing. There was also a small round bone in a few pieces, probably the femur or something.
First, I gently sauteed some crushed garlic in olive oil until the garlicky flavor infused into the oil.

Since this was an Asian dish, I added some Asian "aromatics" -- roughly chopped scallions and slices of fresh ginger root.

I then added the star of the show -- the fermented bean curd. I took about two spoonfuls (maybe two tablespoons worth) of the funky ingredient and added it carefully to the stew base. It was slightly solid so using a spoon I tried to break it up as best I could.

I added the meat and seared it all over:
Once the meat had browned (but was still raw inside), I added star anise, some soy sauce, and water to cover. I brought the mixture to a simmer and let it stew for a few hours, covered. If the level of liquid got too low, I added water.

I was so hungry when it was done that I forgot to take a photo of the finished product, but it was glorious. The house was filled with warm scents of star anise and ginger, the meat was tender and succulent, and the taste of the stew was rich and deep. It warmed me right up.

Recipe: Goat Stew with Fermented Bean Curd Sauce
Ingredients:
1 lb goat meat (preferably leg or other stew meat), in 1.5 inch cubes
3 green onions, chopped into two inch sections, diagonally cut
1.5 tablespoons of sliced ginger (about a thumb's worth)
1 tablespoon sugar
3 tablespoons good quality soy sauce
3 star anise
3 cloves garlic
2 tablespoons fermented bean curd (you can probably find this at an Asian supermarket)
1 Tablespoon olive oil
Water

Directions:
1. Heat the oil on medium-high heat. Add the crushed garlic and saute for 1 minute, or until aromatic. Add the ginger and scallions and saute for another minute.
2. Add the fermented bean curd and try to break apart as finely as possible. Cook for another minute or two, or until aromatic.
3. Add the goat meat, cooking all over until browned.
4. Add the star anise, soy sauce, and water to cover.
5. Bring the stew to a simmer and cook, covered, for at least 2.5 hours, or until the meat is tender and comes easily off the bone. Add water from time to time if the level goes too low.
6. Add sugar to the stew and make sure it is completely dissolved.
7. Serve immediately.

Wednesday, September 22, 2010

Pineapple Powder

I regularly make homemade pineapple juice at home, but inevitably I always have a large amount of pineapple puree left at the end of every juicing session. What do I do with this? Initially, I threw it out, a waste. Eventually I put this in blended drinks. However, before I learned to do this, I had no idea what to do with all my puree.

One day I figured it out. I would make pineapple powder! Theoretically, you can make any flavor of powder. Popular examples are tomato, fennel, mushroom, etc.. The ingredients are simple and it's easy to make.

The basic idea is to take some puree of whatever you are making powder of (in this case, a lot of pineapple pulp), squeeze as much water out of it as possible in a clean dishcloth, and dehydrate it in a dehydrator. Unfortunately, most normal people do not own a dehydrator machine in their homes, so I jerry-rigged a microwave to do the same thing by using the lowest possible setting for heat over an extended period of time. Since microwaves work on the principle of using water in a substance to produce heat, this works.

First, I took some pineapple puree and squeezed the water out as best I could.


Next, I spread the puree in a thin, even layer on top of a sheet of parchment. I trimmed the parchment into a circle shape so it would sit evenly in my microwave.

I set my microwave on 20% power and "cooked" the pineapple puree on the parchment for about 20 minutes. When I took it out, it was leathery and dry.

I think I might've overdried the pulp because there were some char marks and the flavor of the pineapple was extremely faint. I think overdrying the pineapple muted the flavors.

I put this all in a spice mill and grinded it up until no large pieces remained. It was a fine powder when I took it out.

Finally, I bottled the powder. It should be good for about three to five days. Afterwards, the flavor diminishes.


Now comes the million dollar question. What the hell do you use these powders for?

I have no idea. Anyone care to comment?

P.S. My friend likes to call this "pineapple nose candy."

Tuesday, September 21, 2010

Shrimp with Avocado Salsa

One of the reasons I love summer so much is because it's a great season to have salsa. I don't mean your horrible, factory-produced, canned salsa, good for those with bland palates and a taste for food that's jarred and frozen. I love, love, love original salsa, even though it might not be the healthiest thing you could eat!

Avocado is a terrific fruit rich with fiber, potassium, and of course, fat, but it makes a terrific avocado salsa that I've used more than once. It goes great with seafood (I've used it on red snapper before, with some minced chili peppers). Today, I decided to make Shrimp with Avocado Salsa.

First step was to make the court bouillon, an acidic poaching liquid which has flavors of anise and lemon. I combined water and aromatic vegetables in a large pot and heated it. The aromatics were carrots, leeks, and onions. The recipe called for fennel, but I don't really use it that often and I didn't feel like paying $5 for a single bulb, so I substituted a small amount of Pernod. I also added a bouquet garni, which is thyme, parsley, and bay leaves tied inside three leek greens.

Once that came to a boil, I reduced it to a simmer and added the white wine, white vinegar, and halved lemon.


Once it was simmering again, I added the shrimp. I got the shrimp from Pescatore in Grand Central Market once again. I opted for medium-sized shrimp with shell-on because I figured it would help keep in the flavor while it poached. Shopping at Pescatore is nice because they have one of those "customer loyalty cards" they punch out every time you purchase a pound of shrimp or fish. Once you get ten punches, you get a pound of ANY FISH for free. I've done the math for purchasing ten pounds of the cheapest carp and getting a free pound of tuna and it's not bad. Nice, eh?

I let it cool on the counter which took about half an hour, then I peeled and deveined the shrimp. In retrospect, I don't know if the whole court bouillon business did much. I tasted only a slight acidity and anise flavor in the shrimp, but I wasn't wowed. At least my compost bin is happy from the ordeal.

While this was all happening, I made the avocado salad. This was the easiest part. I used my brand-spanking new food processor and finely chopped some red onion and cucumber, then I carefully folded in the cubes of avocado, taking care not to break up the fruit. I also drizzled in some olive oil and seasoned it with salt and pepper to taste.

I had some tomato diamonds in the fridge from the previous day, so it was time for plating. I took a large fork and speared a shrimp on the end. On the tines, I added a heaping spoonful of avocado salsa and placed a few tomato diamonds on top. Here's the final canape plating:

Doesn't that look great? I would definitely make this again, but maybe without the court bouillon step. I think you can simply poach the shrimp in white wine and lemon, and it would come out fine. Also, the Pernod worked extremely well; I could taste a little anise flavor, and it was absolutely a cinch to do. Buying a whole piece of fennel, chopping it up, and letting the unused remainder go bad in your fridge is just a waste.

Happy summer everyone!

Sources:
Shrimp from Pescatore in Grand Central Market
Produce from Greenwich Produce in Grand Central Market

Monday, September 20, 2010

Curry with Thai Eggplant

When I want to find interesting and extremely fresh produce, I like to take a trip to Chinatown. Not only are the wares incredibly fresh, but there is a wide variety of vegetables and fruit. Everything is dirt cheap to boot.

A few weeks ago, I was walking past a vegetables stand and saw Thai eggplant, small green golf-ball--sized pellets. I couldn't resist and purchased a pound of the eggplants.


When I got home, I was perplexed. I had never cooked with Thai eggplant before and had no idea how to cook them. I decided to taste the vegetable. I cut one open -- it was incredibly seedy. The flavor was similar to normal eggplant. I noticed that the flesh seemed porous and absorbent. Then it hit me. Curry! A delicious curry sauce would be sopped up by the flesh of the eggplant. I had used normal eggplant in curries before and so I knew it would work.

I modified a standard recipe for curry that is the basic archetype from which all curries are built; you probably already know it. Turmeric root, cumin, and coriander are toasted until fragrant, then grounded up with garlic and peppers in a spice mill. You can add ginger too. Then diced onions are fried until translucent. Lastly, tomatoes and coconut milk are added. The result is Curry with Thai Eggplant.

I looked in the fridge hoping for some chicken, but no luck, only half a chicken breast. I prayed and hoped and crossed my fingers and opened the freezer. Eureka! I found a packet of snowy halibut. I had just stuck it in the freezer a mere few days ago, and I vacuum sealed it so it didn't suffer from freezer burn in any way.

First, I toasted some of the spices. Here we see cumin, coriander, and turmeric being toasted in a small saucepan.

I love my spice mill. You can make "dry" sauces so easily with one. Instead of chopping herbs, garlic, ginger, spices, parsley, cilantro, et cetera etcetera etcetera, just dump it all in the spice mill and coarsely grind. The more finely you grind it up, the more flavorful it will become. I'm not sure if they start to react after a certain point though, so I only ground until it was a coarse paste.

In a medium skillet, I heated some oil and added the chopped onion, cooking a few minutes until it softened.
I added the curry paste and cooked some more, trying to break up large pieces as best I could (it starts to stick together since it's a dry paste).

I added chopped tomatoes (You can peel the tomatoes if you want; I didn't) and cooked a minute or two. If desired, you can always remove the large pieces of tomato skin. I don't really mind it.

I added about a cup of coconut milk (same amount as the tomatoes), and mixed. I loved the melding of the colors.

I let this simmer (on medium or low) for about 10 minutes so that the tomatoes were breaking down. Meanwhile, I cubed chicken breast and the halibut...

I also quartered the Thai eggplants and mixed them into the curry. They benefit from extended cooking time as the curry has a chance to soak into the eggplants and give them a more flavorful characteristic.

I tasted the curry and deemed it worthy of the protein I was about to add. The chicken and halibut were added to the curry mixture and I cooked it thoroughly, until the fish and meat were cooked. If you are worried about overcooking the fish, I would add the chicken first, cook a few minutes (not completely), then add the fish.

For a finishing touch, I added chopped cilantro and incorporated.


The end product had a terrific kick. The Thai eggplants were the star of the dish; the seeds provided fun texture and the flesh soaked up the zingy curry flavor. The curry was both spicy and cooling. There was also well-balanced counterpoint between the spice of the peppers, the spice of the ginger, and the coolness of the coconut milk.

Sources:
Thai eggplant from Chinatown
Produce from Whole Foods
Halibut from Costco

Thursday, August 26, 2010

Chinese Tea Eggs

One of my favorite traditional Chinese preparation of eggs is Chinese Tea Eggs, also known as 茶叶蛋 (cháyèdàn). While hard-boiled eggs are normally flavorless with a dry yolk, Chinese tea eggs are beautifully marbled and delightful to the eye, aromatic, and delicious and full of intense flavor. They are also not difficult to prepare, and you can refrigerate them for a few days and eat them whenever you want.

The idea is to hard-boil regular chicken eggs -- supermarket-bought ones will do -- until they are about 75% done. You can use any type of eggs (I used a mixture of chicken eggs and quail eggs, as you can see above), but chicken eggs are larger and provide more food for your effort. Then, the eggs' shells are cracked carefully with the back of a spoon, and the eggs are marinated in a simmering mixture of soy sauce, black tea leaves, star anise, sugar, and other optional ingredients. The main items in the marinade are the four ingredients mentioned above, but you can add whatever you want to customize the flavor and aromatics as you wish. Some optional ingredients can include cinnamin stick, cracked black peppercorns, or orange zest. You can imagine the possibilities.

Chinese Tea Eggs - 茶叶蛋 (cháyèdàn)

6 eggs (chicken or quail eggs)
3 tea bags of black tea
1 cup soy sauce
1 tablespoon salt
1 tablespoon sugar
6 pieces star anise
1 cinnamon stick
1 teaspoon cracked black peppercorn (optional)
2 to 3 strips dried mandarin peel (optional)

1. Submerge the eggs in a pot with cold water. Bring the water to a slow boil, then lower heat to simmer for about 3-5 minutes. Remove eggs from heat and allow to cool (or run them under cold water). Once they are cool enough to handle, take the back of a spoon and crack the shell all over. The more cracks, the more the marinade will penetrate the shell, and the more flavorful the resulting egg will be.

2. Return the eggs to a clean pot, and add the rest of the ingredients. Bring liquid to a boil and simmer for 1-3 hours, or even longer, for more intense flavor and color. Add water if level gets too low.

3. Remove from heat and peel egg immediately before serving. You can store them in the refrigerator for a cold snack.

Wednesday, August 25, 2010

Homemade Pesto

One of the herbs I decided to grow in my home garden was basil. Basil has a delicious aroma and distinct taste, and it grows quickly and extremely easily in any home garden. So when I inspected the garden this morning and noticed an abundance of large leaves, ready to be harvested, I decided it was time to do something interesting with them. I didn't want the plants to go to seed (when the leaves become smaller and don't grow as fast), so I harvested both the two plants I have, entirely.

I decided to make pesto, using a very standard recipe. Pesto is a paste made from basil, olive oil, pine nuts, garlic, and Parmesan cheese. Some recipes call for Romano, which has a stronger flavor, but I think the decision is purely subjective.

First, I used two packed cups of basil leaves, which filled my entire blender. I don't recommend using a blender actually because there isn't enough liquid to get it to blend well. I used a spice mill, but I would recommend a food processor or something similar.


I added 1/3 cup pine nuts and pulsed my spice mill, then 3 cloves of garlic and pulsed some more. Then, I slowly drizzled about 1/2 cup of extra virgin olive oil while blending.

Lastly, I added 1/2 cup of grated Parmesan-Reggiano cheese and pulsed my spice mill until well-blended. Add salt and pepper to taste.


What a gorgeous color. The aroma made me want to make pasta that instant, which I did. The pasta needed nothing more than to be tossed with the sauce. I was so delighted with the dish that I didn't bother adding a protein, like chicken. Pesto is a great use for your basil, if you have an abundance of it. The homemade version beats the store-bought version any day. Try it at sometime!

Recipe: Fresh Homemade Pesto

Ingredients
  • 2 cups fresh basil leaves, packed
  • 1/2 cup freshly grated Parmesan-Reggiano or Romano cheese
  • 1/2 cup extra virgin olive oil
  • 1/3 cup pine nuts or walnuts
  • 3 medium sized garlic cloves, minced
  • Salt and freshly ground black pepper to taste
Directions

1 Combine the basil in with the pine nuts, pulse a few times in a food processor. (If you are using walnuts instead of pine nuts and they are not already chopped, pulse them a few times first, before adding the basil.) Add the garlic, pulse a few times more.

2 Slowly add the olive oil in a constant stream while the food processor is on. Stop to scrape down the sides of the food processor with a rubber spatula. Add the grated cheese and pulse again until blended. Add a pinch of salt and freshly ground black pepper to taste.

Makes 1 cup.

Thursday, August 19, 2010

Chesapeake Bay Soft-shell Crab "Sandwich"

Soft-shelled crabs are one of my favorite shellfish. I love shellfish, especially crustaceans, but you always end up with a large pile of shells that you must dispose of promptly or they will smell the next day. Another problem is that they require you to crack open their shells with your hands, making it laborious and tedious to eat. Which brings me to soft-shelled crabs. You can eat the whole thing, shell and all, because their outer exterior is soft enough to devour.

Soft-shelled crabs in the United States usually come from the Chesapeake Bay, which is where I sourced mine. I purchased a few from Pescatore in Grand Central Market. You can also buy soft-shelled crabs in Chinatown during the summer (other seasons, you can only get them frozen), but they are most likely mangrove crabs from Asia, a decent substitute.

As the crabs grow in size, they molt their old shell (which cannot grow in size) and are temporarily "soft-shelled" for several days. Fishermen who capture blue crabs during this phase usually set them aside for market as soft-shelled crabs.

I have prepared soft-shelled crabs in the past a number of ways, including, but not limited to, spicy soft-shelled crabs with linguine, deep-fried crispy soft-shelled crabs, sauteed with garlic and butter, etc.. Most of these preparations rely on the soft-shelled crab being deep-fried or sauteed until crispy. We will use the latter preparation for today's dish: Chesapeake Bay Soft-shell Crab "Sandwich."

The sandwich is composed of six components.

The sauce! Here's the mise en place for the sauce, egg yolks, minced cornichons and cornichon juice, chicken stock, canola oil, Dijon mustard. (Not pictured: minced shallot, minced Italian parsley, Brunoise, salt & pepper)

I blended the egg yolks, chicken stock, cornichon juice, and mustard in a blender. I then slowly drizzled oil in while it was running to emulsify the mixture. I then stirred in the remaining ingredients and refrigerated the sauce.

The capers! I heated 2 inches of canola oil in a small pot and fried capers for 12-15 minutes.

They were deliciously airy and crunchy after I drained them on paper towels. (Sorry about the white-out in this picture, the flash was on too high).


The soft-shelled crab! The worst part of making soft-shelled crabs, for a lot of people, is cleaning the crabs. Usually you can ask your fishmonger to do it for you, but I have a deep respect for all my food and prefer to do it myself. So, with a pair of kitchen scissors in hand, I cut off the face (and eyes) and removed all the gills under the soft cover and the apron from the back of the crab.

Once they were all clean, I dusted the SSCs with salt, pepper, and flour. I heated some clarified butter in a large skillet and sauteed the crabs in the hot butter for 2-3 minutes on each side. I had different cooking times for the claws, which I fried separately. You can see them draining on paper towels below.

The tomato confit! Tomato confit is delicious and you can eat it straight. I should create a diet which is just tomato confit -- you'd never gain weight -- since it's entirely water content.

Anyway, I cored the tomatoes and cut an X in the bottom of each tomato. I dropped each tomato in a pot of boiled salt water for a few seconds to loosen the skin, then moved them to an ice bath. The skins fell right off. I cut each tomato into quarters and cut away the ribs, leaving a smooth tomato petal.

I prepared a large baking sheet drizzled with olive oil, salt, and pepper, and placed the tomato petals on it. Each tomato petal had a small drizzle of more olive oil, salt, pepper, and its own sprig of thyme. I baked this for an hour and a half at 250.

The croutons! I took slices of bread with the crust removed and brushed them with olive oil. I sprinkled some kosher salt on top and baked them for 10-15 minutes. (Not pictured)

I then did the final assembly. A spoonful of sauce, followed by a crouton. Then, a crab body and a piece of tomato confit in half on top. Two crab claws, and some baby arugula on top. Lastly, a sprinkling of fried capers around the plate.

By the way, I am looking for someone who can help me with my food photography skills. I will reward you handsomely! If you live locally, I'll treat you to dinner! If you don't, I can always mail you some desserts or something in a refrigerated cold package. Let me know if you can help or have any tips!

Sources:
Soft-shelled crabs from Pescatore
Produce from Whole Foods

Wednesday, August 18, 2010

Vietnamese-style Pork Chops

It's the late summer. The image that burns most brightly in my mind during this season is when I vacationed in southeast Asia a few years ago in late summer. The sun was setting over the small town where I was staying the evening, a town where buildings were rarely two-storied and none of the roads were paved. Movement was accompanied by a large amount of dust stirred into the dry air. Young boys and girls played an unfamiliar game with a ball in the streets, and cars were rare. I spied a few taxis, but they were often parked and empty; I supposed that the operators were probably sleeping off the heat in their homes.

On this arid evening, I decided to visit a random restaurant in the neighborhood and discovered a delicious lemongrass grilled pork chop. It tasted sweet, tangy, and had a delicious saltiness that I later realized was fish sauce.

I've always been afraid to make pork chops because they can be dry and flavorless if prepared wrong. But I had beautifully cut pork chops in the fridge and some lemongrass in the freezer and felt this would be a preparation that would do them justice.

First, the mise en place:

(From left to right, minced lemon grass, lime/lime juice, minced garlic, honey, fish sauce - nam pla, black pepper)

I created the marinade by combining all the ingredients above and marinated the pork chops in them for about an hour.


I prepared a large cast-iron skillet on high heat and sauteed the pork chops, allowing the sugars in the honey to caramelize and give the meat a delicious burnt sweetness.

Dinner is served!

Recipe (adapted from the Minimalist)

VIETNAMESE-STYLE PORK CHOPS

Time: 30 minutes

2 tablespoons minced lemongrass
1 tablespoon minced garlic
3 tablespoons honey
1 tablespoon nam pla
Juice of 1 lime
1 teaspoon freshly ground black pepper, or more to taste
1 1/2 pounds boneless pork chops or country-style ribs
1 lime, quartered
Chopped Thai basil or cilantro for garnish (optional).

1. Whisk lemongrass, garlic, honey and nam pla in large bowl. Add lime juice and pepper. Place pork in the bowl, turning to coat; let stand while you preheat grill or broiler.

2. Grill or broil pork, spooning marinade over as it cooks, until nicely done, about 10 minutes. Turn only once so that each side browns nicely. Serve with remaining lime and, if you like, the herb garnish.

Yield: 4 servings.